Water heaters are essential for everyday comfort, providing hot water for showers, washing dishes, and laundry. However, common water heater problems can disrupt your daily routine and cause significant inconvenience. Understanding these issues and knowing how to address them can save you time and money. This blog post covers various water heater problems and provides practical solutions to keep your system running smoothly.
Identifying and fixing water heater issues can prevent further damage and extend the lifespan of your unit. From sediment buildup and thermostat malfunctions to valve problems and foul odors, we will guide you through the most frequent water heater problems and offer effective water heater repair and maintenance tips. With the right knowledge and approach, you can tackle these challenges and ensure a steady supply of hot water in your home.
- Why Your Water Heater Is Not Heating Water
- Potential Causes
- Solutions and Maintenance Tips
- Electric vs. Gas Water Heater Problems
- Differences Between Electric and Gas Water Heaters
- Common Issues with Each Type
- Specific Troubleshooting Tips
- Electric Water Heaters:
- Gas Water Heaters:
- Addressing Foul Odors in Hot Water
- Causes of Foul Odors
- Steps to Eliminate Odors
- Limescale and Sediment Buildup
- How Limescale and Sediment Affect Water Heater Performance
- Cleaning and Prevention Tips
- Fixing a Leaking Water Heater
- Identifying the Source of Leaks
- Temporary and Permanent Solutions
- Water Temperature Issues: Too Hot, Too Cold, or Inconsistent
- Diagnosing Water Temperature Problems
- Adjusting Thermostat Settings
- Checking and Replacing Heating Elements
- Electric Water Heaters:
- Gas Water Heaters:
- Dealing with Discolored Water and Odd Noises
- Causes of Rust-Colored or Discolored Water
- Addressing Strange Noises from the Water Heater Tank
- When to Consider Water Heater Replacement or Upgrade
- Signs that Indicate it's Time for a New Water Heater
- Benefits of Upgrading to a More Efficient Model
- Water Heater Maintenance Tips for Longevity
- Regular Maintenance Practices
- Importance of Professional Water Heater Service
- Preventing Common Water Heater Problems
- Preventive Measures to Avoid Common Issues
- Tips for Maintaining Optimal Water Heater Performance
- DIY vs. Professional Water Heater Repair
- When to Attempt DIY Repairs
- When to Call a Professional Plumber
- Final Thoughts on Water Heater Problems
- Frequently Asked Questions
- What causes a water heater to stop working?
- How do I know if my water heater needs to be replaced?
- Can I fix a leaking water heater myself?
- Electric Water Heaters:
- Gas Water Heaters:
- How often should I flush my water heater?
- Common Issues with Electric Water Heaters:
- Common Issues with Gas Water Heaters:
- What are the benefits of a tankless water heater?
- Troubleshooting Electric Water Heaters:
- Troubleshooting Gas Water Heaters:
- Ensure Your Water Heater Runs Smoothly
Why Your Water Heater Is Not Heating Water
One of the most frustrating water heater problems is when it stops heating water. This issue can arise from several factors, each requiring a different solution. Here’s a detailed look at the potential causes and steps you can take to resolve the problem.
Potential Causes
- Sediment Buildup: Minerals from your water supply can settle at the bottom of the tank over time. This sediment can insulate the water from the heating element, reducing its efficiency.
- Faulty Thermostat: The thermostat controls the temperature of the water. If it’s malfunctioning, it may not correctly regulate the heating process, leading to water that is not hot enough or not hot at all.
- Heating Element Issues: Electric water heaters have heating elements that can wear out or break. A damaged heating element means the water won’t reach the desired temperature.
Solutions and Maintenance Tips
- Flush the Tank: Regularly flushing your water heater tank helps remove sediment buildup. To do this, turn off the water heater, connect a hose to the drain valve, and let the water flow out until it runs clear.
- Check and Replace the Thermostat: Ensure that the thermostat is set to the correct temperature. If it’s not working properly, you may need to replace it. Always refer to your water heater’s manual for guidance on how to replace the thermostat.
- Inspect and Replace the Heating Element: If the heating element is broken, it will need to be replaced. This typically involves draining the tank, removing the old element, and installing a new one. It’s often best to hire a professional for this task to ensure it’s done safely and correctly.
Regular maintenance and timely repairs can prevent your water heater from failing to heat water, ensuring a reliable supply of hot water in your home. By understanding these potential issues and their solutions, you can maintain your water heater’s efficiency and extend its lifespan.
Electric vs. Gas Water Heater Problems
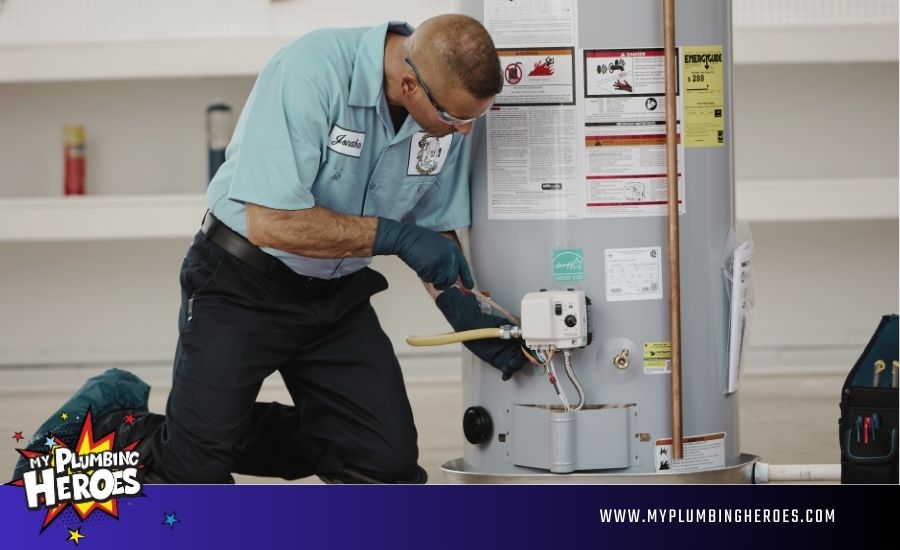
Electric and gas water heaters are two common types of water heaters, each with its unique set of issues. Knowing the differences between these two types and understanding their specific problems can help you troubleshoot and maintain your water heater more effectively.
Differences Between Electric and Gas Water Heaters
Electric water heaters and gas water heaters function differently and, therefore, have different potential problems. Electric water heaters use electric heating elements to warm the water, while gas water heaters rely on a gas burner. The fuel source and heating method impact the types of issues that might arise.
Electric Water Heaters:
- Use electric heating elements inside the tank.
- Typically, it is easier to install and maintain.
- Common in areas without gas supply.
Gas Water Heaters:
- Use a gas burner located at the bottom of the tank.
- Generally heat water faster than electric models.
- Require a gas line and proper ventilation.
Understanding these fundamental differences can help you pinpoint the source of problems when your water heater malfunctions.
Common Issues with Each Type
Both electric and gas water heaters have their own set of common issues, and knowing these can help you quickly diagnose and address problems.
Common Issues with Electric Water Heaters:
- Power Supply Problems: If the circuit breaker trips or there is a power supply problem, the heater won’t function.
- Heating Element Failure: The heating element may burn out over time and need replacement.
- Thermostat Issues: A malfunctioning thermostat can prevent the heater from maintaining the correct water temperature.
Common Issues with Gas Water Heaters:
- Pilot Light Problems: If the pilot light goes out, the burner won’t ignite, and the water won’t heat.
- Gas Supply Issues: Any disruption in the gas supply can prevent the heater from working.
- Thermocouple Problems: A faulty thermocouple can cause the pilot light to go out frequently.
By identifying these issues, you can determine whether your water heater needs a simple fix or professional plumbing service.
Specific Troubleshooting Tips
When you encounter problems with your water heater, specific troubleshooting steps can help resolve the issues based on whether you have an electric or gas unit.
Troubleshooting Electric Water Heaters:
- Check the Power Supply: Ensure the unit is receiving power. Reset the circuit breaker or replace blown fuses.
- Inspect the Heating Element: Test the heating element with a multimeter and replace it if it’s faulty.
- Adjust or Replace the Thermostat: Check the thermostat settings. If it’s not working correctly, it might need replacement.
Troubleshooting Gas Water Heaters:
- Relight the Pilot Light: Follow the manufacturer’s instructions to safely relight the pilot light.
- Check the Gas Supply: Ensure the gas valve is open and the supply is steady. Contact your gas provider if there are supply issues.
- Inspect the Thermocouple: If the pilot light doesn’t stay lit, the thermocouple might be faulty and require replacement.
These troubleshooting tips can help you quickly address and resolve common issues with both electric and gas water heaters, ensuring your home has a steady supply of hot water.
Addressing Foul Odors in Hot Water
Foul odors in your hot water can be a sign of bacterial growth or other issues within your water heater. These unpleasant smells can affect your daily activities and may indicate a need for maintenance or repairs. Understanding the causes and knowing how to eliminate these odors will help ensure your water remains fresh and clean.
Causes of Foul Odors
Several factors can cause foul odors in your hot water. Identifying the root cause is the first step in addressing the problem effectively.
Bacterial Growth:
- Low Water Temperature: If the water temperature is too low, it can create an environment where bacteria thrive.
- Sediment Buildup: Sediment at the bottom of the tank can harbor bacteria that produce foul odors.
Old Anode Rod:
- Corrosion: The anode rod in your water heater is designed to prevent tank corrosion, but over time it can corrode itself and cause a bad smell.
- Sulfur Reactions: The reaction between the anode rod and the water can produce hydrogen sulfide gas, which has a rotten egg smell.
Understanding these causes can help you take the appropriate steps to eliminate the odors and maintain your water heater.
Steps to Eliminate Odors
Once you identify the cause of the foul odors, you can take specific steps to eliminate them and ensure your water heater functions properly.
Increase Water Temperature:
- Set Thermostat to 140°F: Increasing the water temperature to at least 140°F can help kill bacteria that cause foul odors.
- Caution: Be careful when increasing the temperature to avoid scalding risks. Inform household members to be cautious when using hot water.
Replace the Anode Rod:
- Inspect the Anode Rod: Check the condition of the anode rod. If it’s heavily corroded, it’s time to replace it.
- Install a New Anode Rod: Consider using a powered anode rod, which can last longer and reduce the likelihood of odor issues.
Flush the Tank:
- Drain the Tank: Regularly flushing your water heater tank can help remove sediment buildup that harbors bacteria.
- Clean the Tank: Follow the manufacturer’s instructions to safely flush and clean the tank. This helps maintain water quality and prevent odors.
By following these steps, you can effectively eliminate foul odors from your hot water and ensure your water heater remains in good working condition. Regular maintenance and timely replacements can prevent these issues from recurring.
Limescale and Sediment Buildup
Limescale and sediment buildup in your water heater can significantly affect its performance and efficiency. These deposits can reduce the heating capacity and lead to various other problems. Understanding how limescale and sediment impact your water heater and learning how to clean and prevent these issues will help you maintain a reliable hot water supply.
How Limescale and Sediment Affect Water Heater Performance
Limescale and sediment can cause several problems in your water heater, affecting both its efficiency and lifespan.
Reduced Heating Efficiency:
- Insulation Effect: Limescale and sediment act as an insulating layer between the water and the heating element. This means the heater has to work harder and use more energy to heat the water.
- Longer Heating Times: The presence of sediment can slow down the heating process, causing longer wait times for hot water.
Potential Damage to the Water Heater:
- Corrosion: Sediment buildup can lead to corrosion inside the tank, which can eventually cause leaks.
- Noise: Limescale and sediment can cause popping or rumbling noises as the heating elements work harder to heat the water.
Reduced Lifespan:
- Strain on Components: The extra effort required to heat water through a layer of sediment can put a strain on the heating elements and other components, potentially reducing the overall lifespan of the water heater.
Understanding these impacts can highlight the importance of regular maintenance to prevent limescale and sediment buildup.
Cleaning and Prevention Tips
Taking proactive steps to clean and prevent limescale and sediment buildup can help maintain your water heater’s performance and extend its life.
Regular Flushing:
- Flush the Tank Annually: Drain a few gallons of water from the tank every few months to prevent sediment accumulation. Annually, perform a complete flush to thoroughly clean the tank.
- Follow Instructions: Always refer to the manufacturer’s guidelines when flushing the tank to ensure you do it correctly and safely.
Use a Water Softener:
- Install a Water Softener: If you have hard water, consider installing a water softener to reduce the amount of minerals entering your water heater. This can significantly decrease limescale buildup.
- Regular Maintenance: Maintain the water softener according to the manufacturer’s recommendations to ensure it continues to function effectively.
Check the Anode Rod:
- Inspect and Replace: Regularly check the anode rod and replace it if it’s corroded. A healthy anode rod helps prevent corrosion and extends the lifespan of your water heater.
- Use the Right Type: Consider using a powered anode rod if your water has high mineral content, as it can last longer and provide better protection against limescale.
Temperature Management:
- Optimal Temperature: Set your water heater to an optimal temperature, typically around 120°F. Higher temperatures can accelerate sediment buildup, while lower temperatures might not effectively kill bacteria.
By following these cleaning and prevention tips, you can reduce the effects of limescale and sediment buildup in your water heater. This will help maintain its efficiency, reduce the risk of damage, and extend its lifespan.
Fixing a Leaking Water Heater
A leaking water heater can cause significant damage to your home and disrupt your hot water supply. Identifying the source of the leak and knowing how to fix it, whether temporarily or permanently, is crucial to prevent further issues. This section will help you understand common sources of leaks and provide practical solutions.
Identifying the Source of Leaks
To effectively fix a leaking water heater, you first need to identify the source of the leak. Common areas where leaks occur include the drain valve, pressure relief valve, and the tank itself.
Loose Drain Valve:
- Symptoms: Water pooling around the base of the water heater can often be traced to a loose or faulty drain valve.
- Inspection: Check the drain valve at the bottom of the tank for any signs of dripping or moisture.
Pressure Valve Failure:
- Symptoms: The pressure relief valve, typically located on the side or top of the tank, may leak if it’s faulty or if the tank’s pressure is too high.
- Inspection: Look for water dripping from the valve or the discharge pipe connected to it.
Tank Leaks:
- Symptoms: Leaks from the tank itself are usually due to internal corrosion and are more severe.
- Inspection: Examine the tank for any rust spots, cracks, or moisture on its surface.
By identifying the exact source of the leak, you can choose the appropriate method to fix it.
Temporary and Permanent Solutions
Once you’ve identified the source of the leak, you can apply temporary fixes to prevent immediate damage and plan for permanent solutions to ensure long-term functionality.
Temporary Solutions:
- Tighten Loose Valves: If the drain valve or pressure relief valve is loose, tighten it gently with a wrench to stop the leak. Be careful not to overtighten, as this can cause further damage.
- Turn Off the Water Heater: If you can’t immediately fix the leak, turn off the water heater and shut off the water supply to prevent more water from leaking.
- Use Plumber’s Tape: For minor leaks around valves, applying plumber’s tape can provide a temporary seal until a permanent fix is implemented.
Permanent Solutions:
- Replace Faulty Valves: If the drain valve or pressure relief valve is damaged, replacing a faulty valve is a permanent solution. Consult your water heater’s manual for instructions or hire a professional plumber to ensure proper installation.
- Repair or Replace the Tank: If the tank itself is leaking due to corrosion, it might need to be replaced. Repairing the tank is often not feasible, so a new water heater might be necessary.
- Regular Maintenance: To prevent future leaks, perform regular maintenance, including flushing the tank, inspecting the anode rod, and checking all valves and connections.
By addressing leaks promptly with these solutions, you can prevent water damage and ensure your water heater remains functional. Regular maintenance and timely replacements of faulty components will help avoid leaks and extend the life of your water heater.
Water Temperature Issues: Too Hot, Too Cold, or Inconsistent
Water temperature issues are common problems that can affect your comfort and the efficiency of your water heater. Whether your water is too hot, too cold, or has fluctuating temperatures, diagnosing and addressing these issues promptly is essential. This section will help you understand the causes of temperature problems and provide solutions for a consistent hot water supply.
Diagnosing Water Temperature Problems
Before you can fix water temperature issues, you need to diagnose the root cause. Common problems include faulty thermostats, broken heating elements, or sediment buildup.
Water is Too Hot:
- Thermostat Set Too High: The most straightforward cause is that the thermostat is set too high.
- Thermostat Malfunction: A faulty thermostat may not regulate the temperature properly.
Water is Too Cold:
- Thermostat Set Too Low: The thermostat might be set too low, not allowing the water to heat sufficiently.
- Faulty Heating Element: A broken heating element can prevent the water from heating up.
Inconsistent Temperatures:
- Sediment Buildup: Sediment in the tank can cause inconsistent heating.
- Intermittent Heating Element Issues: A heating element that works intermittently can cause temperature fluctuations.
By identifying these symptoms, you can determine the next steps to take to fix the problem.
Adjusting Thermostat Settings
Adjusting the thermostat settings on your water heater can often resolve issues with water that is too hot or too cold.
Steps to Adjust the Thermostat:
- Turn Off Power: For electric water heaters, turn off the power at the circuit breaker. For gas heaters, set the thermostat to the lowest setting.
- Locate the Thermostat: Most electric water heaters have thermostats behind a panel on the side of the tank. Gas water heaters typically have a visible control knob.
- Adjust the Temperature: Use a flathead screwdriver to adjust the thermostat setting. The recommended setting is usually around 120°F for both safety and efficiency.
- Test the Water Temperature: After adjusting, turn the power back on or reset the gas control knob and check the water temperature after a few hours.
Safety Tips:
- Avoid Scalding: Setting the temperature too high can cause scalding. Ensure the setting is safe for all household members.
- Regular Checks: Periodically check and adjust the thermostat to maintain the desired temperature.
Proper thermostat adjustment can help ensure a consistent and safe water temperature.
Checking and Replacing Heating Elements
If adjusting the thermostat doesn’t resolve the issue, you may need to check and replace the heating elements in your electric water heater.
Steps to Check the Heating Elements:
- Turn Off Power: Ensure the power is off at the circuit breaker to avoid electric shock.
- Access the Heating Elements: Remove the access panel and insulation to expose the heating elements.
- Test with a Multimeter: Use a multimeter to check the resistance of the heating elements. A reading outside the recommended range indicates a faulty element.
Replacing the Heating Elements:
- Drain the Tank: Attach a hose to the drain valve and drain the water from the tank.
- Remove the Old Element: Use a wrench to unscrew the faulty heating element.
- Install the New Element: Insert and secure the new heating element, ensuring a tight fit.
- Refill the Tank: Close the drain valve, refill the tank with water, and turn the power back on.
Regular Maintenance:
- Check Elements Annually: Regularly check the heating elements for wear and efficiency.
- Sediment Removal: Flushing the tank helps prevent sediment from damaging the heating elements.
By following these steps, you can diagnose and fix water temperature issues, ensuring a consistent supply of hot water in your home.
Dealing with Discolored Water and Odd Noises
Discolored water and odd noises from your water heater can be alarming and indicate underlying issues. Rust-colored water often points to corrosion, while strange noises can suggest sediment buildup or other problems. Understanding the causes and knowing how to address them will help maintain the quality and efficiency of your water heater.
Causes of Rust-Colored or Discolored Water
Discolored water from your water heater can be caused by several factors. Identifying the cause is essential for resolving the issue effectively.
Corrosion in the Tank:
- Rust-Colored Water: If the water is rust-colored, it often means that the inside of your water heater tank is corroding.
- Anode Rod Failure: The anode rod, which protects the tank from corrosion, may be worn out and need replacement.
Sediment Buildup:
- Mineral Deposits: Minerals in the water can settle at the bottom of the tank, causing sediment to mix with the water and result in discoloration.
- Water Quality: Hard water with high mineral content can exacerbate sediment buildup, leading to discolored water.
Pipe Corrosion:
- Rusty Pipes: Sometimes the issue is not with the water heater itself but with the pipes. Corroded pipes can cause rust-colored water to flow into your home.
Addressing Discolored Water:
- Inspect the Anode Rod: Check and replace the anode rod if it’s heavily corroded. This can help prevent further rusting inside the tank.
- Flush the Tank: Regularly flush the water heater to remove sediment and mineral deposits.
- Check the Pipes: Inspect your home’s plumbing for signs of corrosion and consider replacing old pipes.
By addressing these causes, you can improve the quality of your hot water and extend the life of your water heater.
Addressing Strange Noises from the Water Heater Tank
Strange noises coming from your water heater can be caused by various issues, often related to sediment buildup or heating element problems. Identifying the source of these noises is key to resolving them.
Common Noises and Their Causes:
- Popping or Rumbling: These noises are typically caused by sediment buildup at the bottom of the tank. As the water heats, the sediment traps steam bubbles, creating popping or rumbling sounds.
- Sizzling: A sizzling noise can indicate a leak where water is dripping onto the heating elements.
- Ticking or Tapping: These sounds are often caused by the expansion and contraction of the heating elements or the tank itself.
Steps to Address Noises:
- Flush the Tank: To remove sediment, attach a hose to the drain valve and flush the tank until the water runs clear. This can help reduce or eliminate popping and rumbling noises.
- Check for Leaks: Inspect the tank and connections for leaks that might be causing sizzling noises. Tighten any loose connections or replace faulty parts.
- Inspect Heating Elements: For electric water heaters, check the heating elements for signs of wear or damage. Replace any faulty elements to stop unusual noises.
- Install an Expansion Tank: If the noises are due to thermal expansion, consider installing an expansion tank. This can help absorb the excess pressure and reduce the noise.
Regular maintenance and timely repairs can help prevent strange noises and ensure your water heater operates quietly and efficiently.
When to Consider Water Heater Replacement or Upgrade
Knowing when to replace or upgrade your water heater is crucial for maintaining an efficient and reliable hot water supply. Over time, water heaters can become less efficient and more prone to problems. This section will help you identify signs that indicate it's time for a new water heater and explain the benefits of upgrading to a more efficient model.
Signs that Indicate it's Time for a New Water Heater
Certain signs suggest that your water heater is nearing the end of its lifespan or is no longer functioning efficiently. Recognizing these signs can help you decide when it’s time for a replacement.
Age of the Water Heater:
- Typical Lifespan: Most water heaters last between 8 to 12 years. If your unit is within or beyond this range, it might be time to consider a replacement.
- Frequent Repairs: An older water heater that requires frequent repairs is a clear indicator that it’s nearing the end of its useful life.
Persistent Issues:
- Constant Leaks: If your water heater is constantly leaking despite multiple repairs, it might be more cost-effective to replace it.
- Inconsistent Water Temperature: Ongoing issues with water temperature, such as fluctuating between too hot and too cold, can signal that the heater is failing.
- Rusty Water: Persistent rust-colored water even after flushing the tank and replacing the anode rod indicates significant internal corrosion.
Rising Energy Bills:
- Reduced Efficiency: An old water heater can become less efficient over time, leading to higher energy bills. If you notice a significant increase in your energy costs, your water heater might be the culprit.
Recognizing these signs can help you avoid sudden water heater failure and plan for a timely replacement.
Benefits of Upgrading to a More Efficient Model
Upgrading to a new, more efficient water heater comes with several benefits that can improve your home’s energy efficiency and provide a more reliable hot water supply.
Improved Energy Efficiency:
- Lower Energy Bills: Modern water heaters are designed to be more energy-efficient, which can significantly reduce your monthly energy costs.
- Energy Star Rated Models: Many new water heaters come with Energy Star ratings, ensuring they meet strict energy efficiency guidelines.
Enhanced Performance:
- Consistent Water Temperature: Newer models provide more consistent and reliable water temperatures, reducing the risk of scalding or cold showers.
- Faster Heating: Advanced technology in new water heaters allows for quicker heating times, ensuring you have hot water when you need it.
Increased Longevity:
- Longer Lifespan: Modern water heaters are built with improved materials and technology, often resulting in a longer lifespan compared to older models.
- Reduced Maintenance: Newer models require less maintenance and are less prone to common issues such as sediment buildup and corrosion.
Environmental Benefits:
- Reduced Carbon Footprint: Energy-efficient water heaters consume less energy, helping to reduce your home’s carbon footprint.
- Eco-Friendly Options: There are several eco-friendly water heater options available, such as tankless water heaters and solar water heaters, which use less energy and are better for the environment.
By upgrading to a more efficient model, you can enjoy the benefits of lower energy bills, improved performance, and a longer-lasting water heater. This investment can also contribute to a more sustainable and eco-friendly home.
Water Heater Maintenance Tips for Longevity
Regular maintenance of your water heater is essential for ensuring its efficiency and extending its lifespan. Proper upkeep can help prevent common problems and keep your water heater running smoothly for years. This section provides key maintenance practices and highlights the importance of professional service.
Regular Maintenance Practices
Performing regular maintenance on your water heater can prevent many issues and keep it in good working condition. Key practices include flushing the tank and inspecting the anode rod.
Flushing the Tank:
- Why It’s Important: Flushing the tank removes sediment buildup that can insulate the heating elements and reduce efficiency.
- How to Flush the Tank:
- Turn Off the Water Heater: For electric models, turn off the power at the circuit breaker. For gas models, set the thermostat to the lowest setting.
- Connect a Hose to the Drain Valve: Attach a garden hose to the drain valve at the bottom of the tank and direct the other end to a suitable drainage area.
- Open the Drain Valve: Let the water flow out until it runs clear, flushing out the sediment. Close the valve, remove the hose, and refill the tank.
Inspecting the Anode Rod:
- Purpose of the Anode Rod: The anode rod helps prevent corrosion inside the tank by attracting corrosive elements.
- Turn Off the Water Heater: Ensure the power or gas is turned off before inspection.
- Locate and Remove the Anode Rod: The anode rod is typically located at the top of the tank. Use a wrench to unscrew it and pull it out for inspection.
- Check for Corrosion: If the rod is heavily corroded or less than half an inch thick, it should be replaced.
- Install a New Anode Rod: Insert a new anode rod and tighten it securely.
Regularly performing these maintenance tasks can significantly extend the life of your water heater and improve its efficiency.
Importance of Professional Water Heater Service
While regular DIY maintenance is important, professional service plays a crucial role in the longevity and efficiency of your water heater. Here’s why professional service matters:
Comprehensive Inspection:
- Detailed Check: Professionals conduct a thorough inspection of all components, including the thermostat, heating elements, and safety valves.
- Early Detection: They can identify potential issues early on, preventing costly repairs or replacements.
Expert Maintenance:
- Proper Techniques: Technicians use the right tools and methods to perform maintenance tasks effectively, such as flushing the tank and replacing the anode rod.
- Safety Assurance: Professional service ensures all maintenance tasks are performed safely, reducing the risk of accidents or damage.
Efficiency Optimization:
- Performance Tuning: Professionals can adjust settings and optimize the performance of your water heater, ensuring it operates at peak efficiency.
- Energy Savings: Regular professional maintenance can help reduce energy consumption, lowering your utility bills.
Peace of Mind:
- Reliable Service: Knowing that your water heater is in good hands provides peace of mind. Professionals can handle complex issues that may be beyond DIY capabilities.
- Warranty Protection: Many water heater warranties require regular professional maintenance to remain valid. Keeping up with professional service can protect your warranty coverage.
Incorporating professional service into your maintenance routine ensures that your water heater receives the care it needs to perform efficiently and last longer. Regular inspections and expert maintenance can prevent problems, save money, and provide a reliable supply of hot water.
Preventing Common Water Heater Problems
Preventing common water heater problems before they arise is crucial for ensuring a continuous supply of hot water and avoiding costly repairs. By taking proactive steps and following maintenance tips, you can keep your water heater in top condition. This section covers preventive measures and tips for maintaining optimal water heater performance.
Preventive Measures to Avoid Common Issues
Implementing preventive measures can help you avoid many common water heater problems, such as leaks, temperature issues, and sediment buildup.
Regular Inspections:
- Visual Checks: Regularly inspect your water heater for signs of wear, rust, or leaks. Early detection can prevent small issues from becoming major problems.
- Listen for Noises: Unusual noises, like popping or rumbling, can indicate sediment buildup. Addressing these noises early can prevent damage.
Flushing the Tank:
- Routine Flushing: Flush your water heater tank at least once a year to remove sediment. This helps maintain efficiency and prevents overheating.
- Procedure: Follow the steps to turn off the water heater, connect a hose to the drain valve, and flush the tank until the water runs clear.
Check the Anode Rod:
- Inspect Annually: The anode rod helps prevent tank corrosion. Check it annually and replace it if it’s significantly corroded.
- Replacement Steps: Turn off the water heater, remove the anode rod with a wrench, and replace it if necessary.
Maintain Proper Temperature:
- Optimal Setting: Set the thermostat to 120°F to balance energy efficiency and prevent scalding.
- Regular Adjustments: Periodically check and adjust the thermostat to ensure it’s maintaining the desired temperature.
Pressure Relief Valve:
- Test the Valve: Test the pressure relief valve annually by lifting the lever and letting it snap back. If it doesn’t release water, it may need replacement.
- Importance: A functioning pressure relief valve prevents excessive pressure buildup, which can cause leaks or tank rupture.
By incorporating these preventive measures into your routine, you can significantly reduce the likelihood of common water heater problems.
Tips for Maintaining Optimal Water Heater Performance
Maintaining your water heater’s performance involves regular care and attention to various components. Here are some tips to ensure your water heater operates efficiently and reliably.
Monitor Water Quality:
- Use a Water Softener: If you have hard water, consider installing a water softener to reduce mineral buildup in the tank.
- Regular Testing: Test your water quality periodically to ensure it’s within acceptable ranges for your water heater.
Insulate the Tank:
- Insulation Blanket: Use an insulation blanket to wrap your water heater tank. This helps reduce heat loss and improves efficiency.
- Pipe Insulation: Insulate the first few feet of the hot water pipes exiting the tank to maintain water temperature.
Professional Maintenance:
- Annual Service: Schedule professional maintenance at least once a year. A technician can perform a thorough inspection, flush the tank, and check all components.
- Warranty Protection: Regular professional maintenance can also help maintain your water heater’s warranty coverage.
Energy Efficiency:
- Upgrade When Needed: Consider upgrading to a more energy-efficient model if your water heater is old or frequently needs repairs.
- Energy Star Models: Look for Energy Star-rated water heaters for better efficiency and lower energy costs.
Safety Precautions:
- Install Carbon Monoxide Detectors: If you have a gas water heater, install carbon monoxide detectors in your home to detect any potential leaks.
- Ventilation: Ensure proper ventilation for gas water heaters to prevent dangerous gas buildup.
By following these tips, you can maintain your water heater’s optimal performance, ensuring a reliable supply of hot water and extending the unit’s lifespan.
DIY vs. Professional Water Heater Repair
Deciding whether to attempt DIY repairs or call a professional plumber can be challenging. While some water heater issues are simple enough for homeowners to handle, others require professional expertise. This section will help you determine when it’s appropriate to fix problems yourself and when it’s best to hire a professional.
When to Attempt DIY Repairs
Some water heater problems are straightforward and can be safely addressed by homeowners with basic tools and knowledge. Here are situations where DIY repairs are typically appropriate:
Minor Leaks:
- Tightening Connections: If you notice minor leaks from valves or pipe connections, you can often fix these by gently tightening the connections with a wrench.
- Replacing Washers or Seals: Small leaks from faucets or fittings may be resolved by replacing worn-out washers or seals.
Sediment Buildup:
- Flushing the Tank: Regularly flushing your water heater tank to remove sediment buildup is a relatively simple task that can be done without professional help. Follow the manufacturer’s instructions for proper flushing procedures.
Thermostat Adjustments:
- Temperature Settings: Adjusting the thermostat to the desired temperature (typically 120°F) is a simple process that doesn’t require professional assistance. Ensure the power is off before making any adjustments.
Anode Rod Inspection and Replacement:
- Checking for Corrosion: Inspecting and replacing the anode rod is manageable for most homeowners. Turn off the water heater, remove the anode rod with a wrench, and replace it if it’s heavily corroded.
Pressure Relief Valve Testing:
- Annual Testing: Testing the pressure relief valve by lifting the lever and ensuring it releases water is a straightforward task. If it doesn’t function properly, it may need replacement.
DIY repairs can save money and time, but it’s important to know your limits and ensure safety when performing these tasks.
When to Call a Professional Plumber
While some water heater issues can be handled with DIY methods, others require the expertise and tools of a professional plumber. Here are situations where you should call a professional:
Major Leaks:
- Severe Tank Leaks: If your water heater tank is leaking, it’s often a sign of internal corrosion or significant damage. Replacing the tank or performing complex repairs should be left to a professional.
- Persistent Valve Leaks: If tightening connections or replacing seals doesn’t stop a leak, a plumber can diagnose and fix the underlying issue.
Electrical Issues:
- Faulty Wiring: Problems with the electrical components of an electric water heater, such as faulty wiring or circuit breaker issues, should be handled by a licensed electrician or professional plumber.
- Heating Element Replacement: Replacing heating elements can be complex and requires proper electrical safety precautions. A professional can ensure the replacement is done correctly and safely.
Gas Water Heater Problems:
- Pilot Light Issues: If you’re having trouble with the pilot light or gas supply, it’s best to call a professional. Gas-related repairs require specific knowledge and safety measures.
- Thermocouple Replacement: A malfunctioning thermocouple that causes the pilot light to go out frequently should be replaced by a professional to ensure safe operation.
Complex Diagnoses:
- Unknown Problems: If you’re unsure of the cause of a water heater issue or if multiple problems occur simultaneously, a professional plumber can perform a thorough inspection and provide an accurate diagnosis.
- Warranty Considerations: Many water heater warranties require professional maintenance and repairs to remain valid. Check your warranty terms before attempting any repairs.
Safety Concerns:
- Carbon Monoxide Risks: For gas water heaters, improper repairs can lead to dangerous carbon monoxide leaks. A professional can ensure all repairs are done safely and correctly.
Calling a professional plumber ensures that complex or potentially dangerous issues are handled properly. Professional expertise can save you from costly mistakes and ensure your water heater operates safely and efficiently.
Final Thoughts on Water Heater Problems
Maintaining and troubleshooting your water heater can prevent common problems and ensure a reliable hot water supply. Understanding the various issues, from sediment buildup and temperature inconsistencies to leaks and foul odors, allows you to address them promptly and effectively. Regular maintenance practices, such as flushing the tank, checking the anode rod, and adjusting the thermostat, can extend the lifespan of your water heater and improve its efficiency.
While some repairs can be handled with basic DIY methods, knowing when to call a professional plumber is crucial for safety and proper functioning. By staying proactive and informed about your water heater’s condition, you can enjoy consistent hot water and avoid unexpected breakdowns. Implementing these tips and guidelines will help you maintain a well-functioning water heater for years.
Frequently Asked Questions
What causes a water heater to stop working?
Several factors can cause a water heater to stop working, including sediment buildup, a faulty thermostat, or a broken heating element. Sediment can insulate the heating element, reducing efficiency. A malfunctioning thermostat may not regulate the temperature correctly, while a damaged heating element fails to heat the water.
How do I know if my water heater needs to be replaced?
Signs that your water heater needs replacement include frequent repairs, persistent leaks, rusty water, and inconsistent water temperatures. If your water heater is over 10 years old and shows these symptoms, it may be more cost-effective to replace it with a newer, more efficient model.
Can I fix a leaking water heater myself?
Minor leaks from valves or connections can often be fixed by tightening the connections or replacing seals. However, significant leaks, especially from the tank itself, should be addressed by a professional. Attempting to fix major leaks yourself can lead to further damage and potential safety hazards.
How often should I flush my water heater?
Flushing your water heater at least once a year is recommended to remove sediment buildup. Regular flushing helps maintain efficiency, prevent corrosion, and extend the lifespan of your water heater. In areas with hard water, more frequent flushing may be necessary.
What are the benefits of a tankless water heater?
Tankless water heaters provide hot water on demand, reducing energy consumption by heating water only when needed. They have a longer lifespan compared to traditional tank heaters, take up less space, and offer endless hot water supply, making them an efficient and convenient option.
Ensure Your Water Heater Runs Smoothly
For professional water heater maintenance and repair services, contact My Plumbing Heroes in Nokesville VA. today at (571) 454-9721. Our experts are here to help keep your water heater in optimal condition.

